Table of Contents
Address Book
The address book helps you to manage your contacts, making it easier to quickly share your files with your friends and family.
Once you have added your contacts, when it's time to send out an e-mail invitation to share a link, instead of filling out the details manually, you can simply select an address or a group from your contacts and have it automatically populate the receiver field.

Toolbar
| Button | Function | Description |
|---|---|---|
 | Refresh | Refresh the content. |
 | Add Group | Create a new group. |
 | Delete Group | Delete the selected group (the group “All” cannot be deleted). The contacts in that group will not be deleted, only the group itself. You can still find the contacts in the group “All”. |
 | Edit Group | Edit the selected group to rename it. |
 | Add Contact | Create a new contact in the selected group. The contact is also added to the group “All”. |
 | Delete Contact | Delete the selected contact. |
 | Remove from Group | Remove the selected contact from the current group. The contact itself is not deleted and can still be found in the group “All”. |
 | Import | Import contacts from a Google CSV file. |
 | Export | Export contacts to a Google CSV file. |
Group List
The group list shows the default group “All” and all your custom contact groups. The group “All” contains all the contacts that are stored in the address book and cannot be deleted or edited.
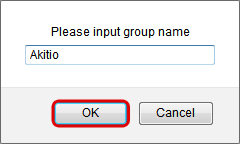
Add a Group
- Click Add Group
- Enter a name for the new group.
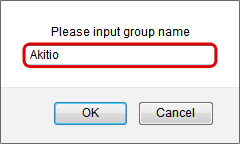
- Click OK.
Edit a Group
- Select the group that you would like to edit from the group list.
- Click Edit Group
- Enter a new name for the group.
- Click OK.
Delete a Group
- Select the group that you would like to delete from the group list.
- Click Delete Group
- Click OK.

Contact List
The contact list shows all the contents in the currently selected group.
Add a Contact
- Select the group where you would like to add the new contact.
- Click Add Contact
- Enter all the relevant information for the new contact in the contact information area.

- Click Save.

Delete a Contact
- Select the group which the contact belongs to or select the group “All”.
- Select the contact that you would like to delete.
- Click Delete Contact
Add a Contact to a Group
- Open the group that contains your contacts (e.g. group “All”).
- Select a contact, then drag and drop it into the new group.

Remove a Contact from a Group
- Select the group which the contact belongs to.
- Select the contact that you would like to remove from that group.
- Click Remove from Group
Contact Information Area
Select a contact from the contact list and the information of that contact will be displayed in the contact information area.
Edit a Contact
- Select the group which the contact belongs to or select the group “All”.
- Select the contact that you would like to edit.
- In the contact information area, click Edit.

- Edit the contact information and then click Save.

Import/Export
The address book uses the Google CSV format. You can import your contacts from Gmail or export your contacts from the address book. This function allows you to synchronize your contacts with other E-Mail clients that are compatible with the Google CSV format and make a backup of your contacts that you can keep for safe keeping on your computer or another hard drive.
Import Contacts from Gmail
Follow these steps to import the contacts from your Gmail account to your address book.
- Sign in to your Gmail account.

- Under Gmail, select Contacts.

- Click More and select Export.

- Choose the contacts that you would like to export, select Google CSV format and click Export to save the contacts on your computer.

- Upload the exported contacts to your network drive.

- Open the Address Book

- Click Import
- Locate the file google.csv, select it and then click Open to import the contacts.

Export Contacts to Gmail
Follow these steps to export the contacts from your address book and import them to your Gmail account.
- Click Export
- Enter a file name and click Save to store your contacts as a CSV file on the network drive.

- Open the file explorer and locate the CSV file.

- Click Download
 and store the file on your computer.
 - Sign in to your Gmail account.
- Under Gmail, select Contacts.
- Click More and select Import.

- Locate the CSV file that you have stored on your computer and click Import to import the contacts.

