This is an old revision of the document!
Table of Contents
WebDAV 操作方式(Windows OS)
WebDAV 是附屬於網頁伺服器底下的一個服務,用於上傳或下載文件。它可以被用於近端與遠端的資料傳輸,而 Samba 僅可用於在近端網絡上。然而,傳輸速率因傳送的封包模式,效能會比較慢,以及其它的限制(例如單一檔案大小的限制)。
只要有可能,我們建議您近端使用[zh-tw:fm_smb_pc|SMB]、遠端使用[zh-tw:fm_ftp_pc| FTP]]進行資料的傳送,而不是透過 WebDAV。原因是資料傳輸速度會更快,更可靠。
設定 WebDAV 服務
WebDAV 服務預設已經開啟,您不需要在作另外的設定,因為該服務是網頁伺服器底下的一個服務,所以並沒有關閉的選項。
建立網路磁碟連線
- 在區域網路(LAN)中建立網路磁碟連線,請使用區域網路的 IP (例如: http://192.168.10.5/webdav).
- 在網際網路(WAN)中建立網路磁碟連線,請使用外部網路的 IP (例如: http://61.57.149.125/webdav) 或是私有雲的網址 (例如: http://devicename.myakitio.com/webdav).
WebDAV 會要求啟動 WebClient 服務。如果此服務被關閉,請手動啟動該服務。在電腦的「控制面板>管理工具>服務」中,找到“WebClient”服務並啟動它。
Windows Vista 或 Windows 7 以上使用 WebDAV 工作時,如果你覺得速度慢,請至微軟 FAQ 找尋解決方案[http://support.microsoft.com/kb/2445570|FAQ的]。請記住,WebDAV 服務是比 Samba 或 FTP 還慢,甚至會受到系統網路設置的影響。
如果你在傳輸大檔案時碰到錯誤0x800700DF:文件大小超過允許的限制,無法儲存。。您可以通過修改註冊表([HKLM\SYSTEM\CurrentControlSet\Services\WebClient\Parameters\FileSizeLimitInBytes])來解決這個問題,但最大值為 FFFFFFFF(4294967295),這意味著你可以上傳的最大檔案大小是4GB。
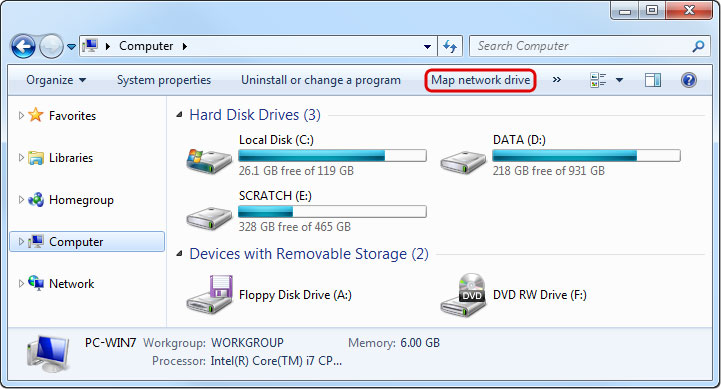
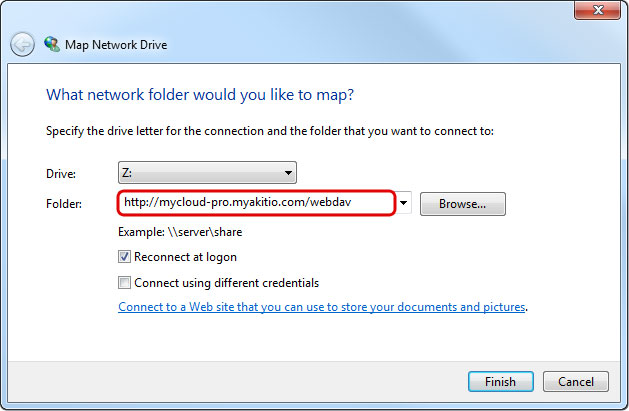
- On your computer, open the file explorer.
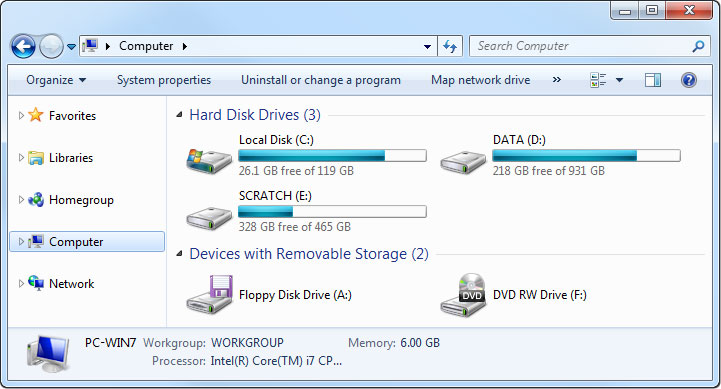
- Select Map network drive.
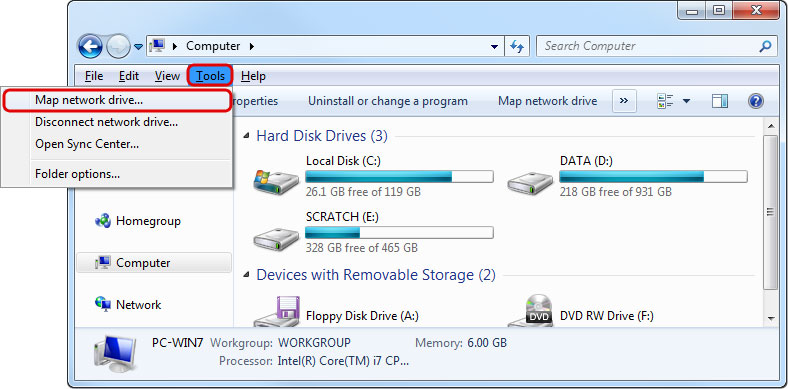
- If you don't see the shortcut, go to Tools in the menu bar and there you can select Map network drive….
- Enter http:// followed by the device name and the web portal domain (e.g. http://mycloud-pro.myakitio.com) or the IP address (e.g. http://192.168.1.10) plus the webdav folder.
- To create a permanent link that also stays after a system reboot, select Reconnect at logon and then click Finish to complete the setup wizard.
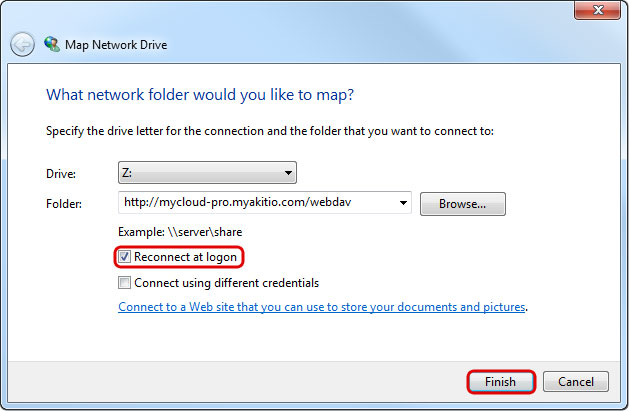
- When prompted for the login credentials, enter the username and password of your user account on the network drive and click OK. As an example, the administrator would enter admin for both username and password.

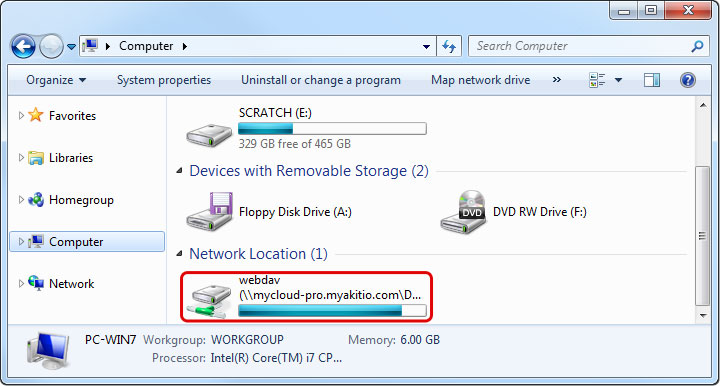
- You now have a permanent link on your computer and can access the files just like you would do with any other drive.
WebDAV Client
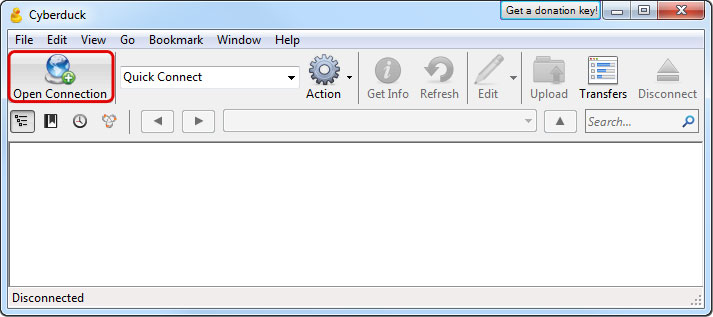
With a 3rd party WebDAV client, it's not only easier to manage multiple accounts but in many cases, it's also faster to transfer files compared to the standard file explorer in Windows. If you already have a WebDAV client or a FTP client that also supports WebDAV, simply use your preferred program. If you are still looking for a client, you could try Cyberduck, BitKinex or CarotDAV to name a few free programs.
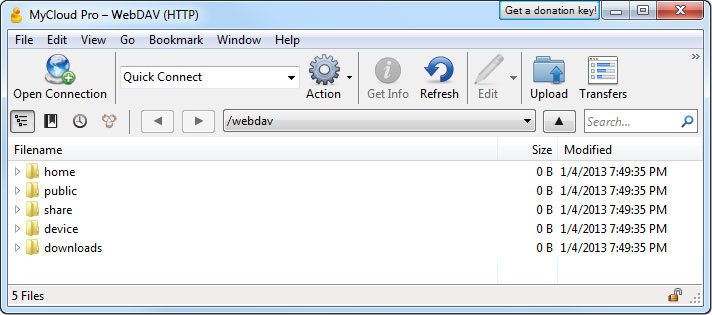
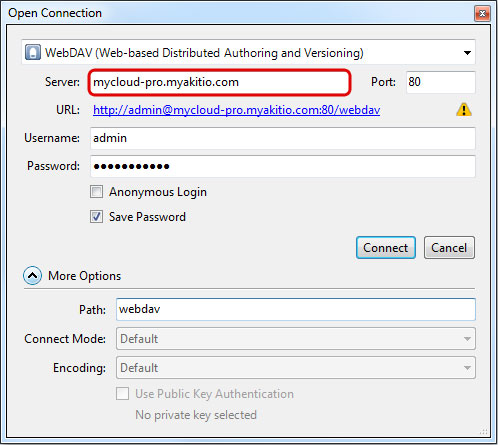
- Start up your WebDAV client. In this example, we are using Cyberduck.

- Open a new connection.
- Select WebDAV for the protocol.

- Enter the device name and the web portal domain (e.g. mycloud-pro.myakitio.com) or the IP address (e.g. 192.168.1.10) for the server.
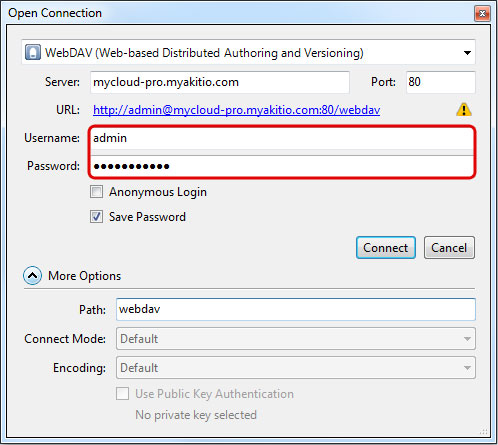
- Enter the username and password of your user account on the network drive. As an example, the administrator would enter admin for both username and password.
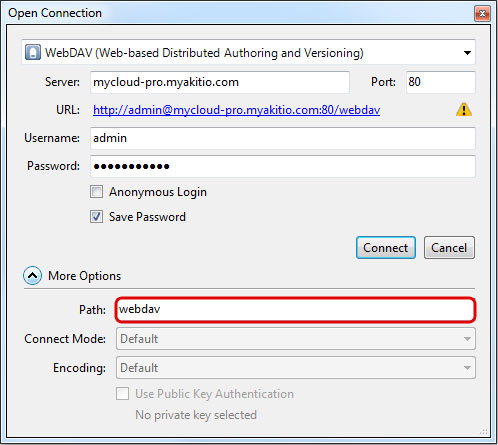
- Enter webdav for the path.
- Double check your settings and then click Connect.
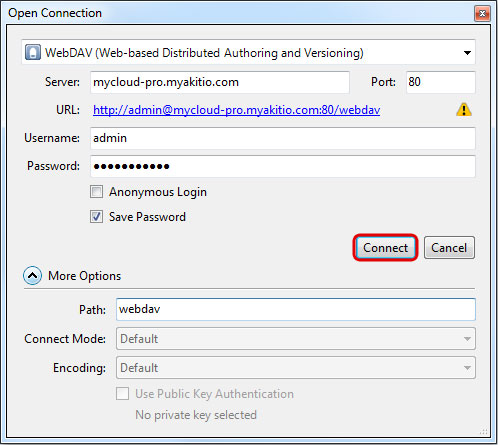
- You can now manage your files on the network drive through the WebDAV client.