Table of Contents
USB Drives
USB Copy Button
The USB copy button (only available on the MyCloud Duo and the MyCloud Pro) allows you to quickly back up data from an external USB storage device such as a USB hard drive, USB flash drive or USB card reader. When a USB drive is connected to your network drive via USB, all files on the USB drive can be copied to the internal hard drive of the network drive with a push on a single button.
Follow the steps below to complete USB Copy.
- Connect the USB drive to the front port of your network drive. We recommend using self-powered USB devices.
- Press the Copy button for one second to copy all the files from the attached USB drive to the Public folder on the network drive. During the backup, the system LED is flashing green.
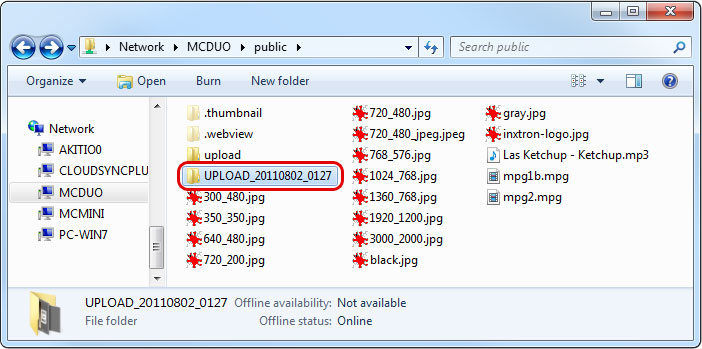
- A new folder starting with UPLOAD and the current date plus time is automatically created and all files from the USB drive will be copied into it. When the backup is done, the USB drive will be ejected automatically.
- The USB drive can now be removed and the backup data can be accessed on the network drive.
USB Drives
If your MyCloud does not have a USB copy button, you can also access and backup the data on the attached USB drives manually. It does not matter if you use the front ports or the USB ports at the back of your device.
- Connect the USB drive to the USB port on your network drive and turn on the power.
- Open the web browser and login as administrator (admin).
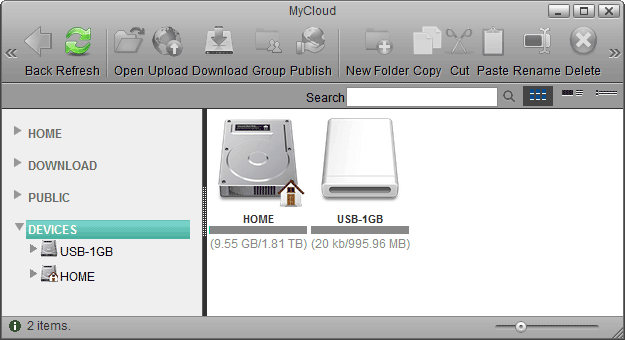
- You can now access the data on the USB drive under DEVICES.
Supported file systems
Following file systems are supported by the network drive.
- FAT32
- NTFS (make sure to follow the safe removal procedure when ejecting the drive from the computer)
- HFS (read only)
- EXT2, EXT3, EXT4
- XFS
Ejecting USB Drives
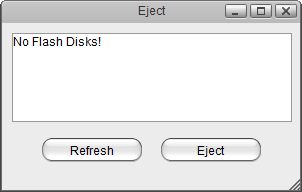
To safely remove an attached USB drive, please eject it first, before you disconnect or turn off the drive.
- Click on the eject icon
 in the taskbar.
 - Select the USB drive that you would like to remove from the list of available drives.
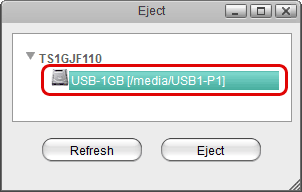
- Click Eject.
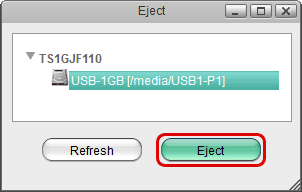
- You can now disconnect or turn off the USB drive.
USB Copy Benchmark
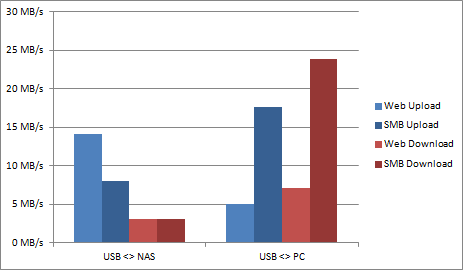
The file transfer rate when copying files back and forth between the network drive and the USB drive varies greatly, depending on how the files are transferred and where the USB drive is connected to.
The best way to manage your data on the USB drive is, when the USB drive is attached to your computer and the network drive is mounted to that computer through Samba. No matter if you are uploading files (USB to NAS) or downloading files (NAS to USB), this method gives you the best results.
The following benchmark, tested on a MyCloud Mini with firmware version 20121220, shows the different transfer rates clearly.
| Label | Description |
|---|---|
| USB <> NAS | The USB drive is connected to the network drive. |
| USB <> PC | The USB drive is connected to the computer. |
| Web Upload | The files are copied through the web interface from the USB drive to the network drive. |
| SMB Upload | The files are copied through Samba from the USB drive to the network drive. |
| Web Download | The files are copied through the web interface from the network drive to the USB drive. |
| SMB Download | The files are copied through Samba from the network drive to the USB drive. |
For more information about how to mount the network drive using Samba, please see File Management > Samba for PC users.
