This is an old revision of the document!
Table of Contents
How To Articles and Tutorials
Local and Remote Login
How to troubleshoot the error "Device offline"
- The most obvious reason for this error message is that the device is powered off. Please turn on the power, wait for about 1 minute for the system to start up and then try again.
- If the device is up and running but you still get this error, there is a problem with the network connection somewhere in between your device and our server. See the following tips on how to troubleshoot the network connection.
- On your network router (this is the device that connects your home to the internet), check that following ports are not blocked.
- TCP port 9000 is required for the default connection to our server.
- TCP port 10080 (or 10081-10100 if 10080 is used) is required if your router supports the UPnP function.
- TCP port 1194 is required if you have already enabled both port 9000 and 10080 but it still does not work.
- If you are unsure how to setup your network router or the above tips have not helped so far and your router has a so called “DMZ zone”, add the IP address of your network drive to the DMZ zone. You can also use this method to temporarily test if the router setup is indeed a problem.
- If none of the above helps, connect a computer to the same local area network (LAN) that the network drive is connected to. Open the web browser and access the internet (e.g. http://www.google.com). This is to test that your home has internet access.
- For further network tests, use the finder utility for Windows or the finder utility for Mac to locate your device on the local network. Login using its IP address rather than our web portal.
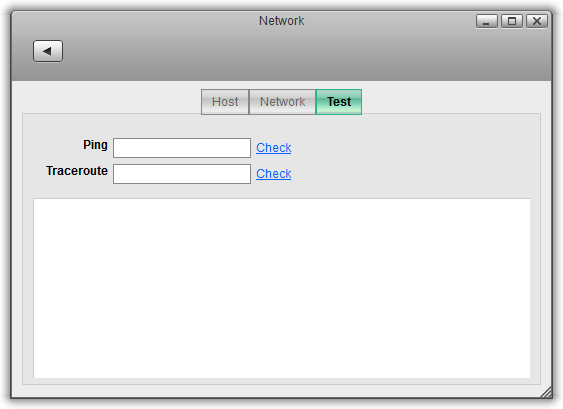
- Go to Preferences and select Network.
- Open the Test tab.
- Enter myakitio.com into the first field after “Ping” and click Check.
- Copy and paste the results into a text file.
- Enter myakitio.com into the second field after “Traceroute” and click Check.
- Copy and paste the results into a text file.
- Open the drop-down menu in the top left corner under the A logo and select Server Info.
- Copy and paste the whole text into a text file.
- Depending on the results from the tests above, you might be able to narrow down and solve the problem yourself. If you see that there is no internet connection at all, it is a local issue at your home. If you see that there is an internet connection but it is extremely slow, it might be an issue at your ISP (internet service provider) or somewhere on the way to our server.
- If you are unsure or not able to solve the problem, please contact tech support. Make sure to include the text files you have saved earlier and explain what the problem is as well as what you have done already to solve it.
How to troubleshoot the error "Connect to device timeout"
- The reason for this error is usually temporary. At first, we recommend to wait for a minute and then try again.
- If the above tip does not solve the problem, please reboot the network drive.
- If none of the above helps or the reboot solves the problem only for a short while and it happens again very often, please contact tech support.
- To better help us troubleshoot the device, use the finder utility for Windows or the finder utility for Mac to locate your device on the local network. Login using its IP address rather than our web portal (assuming that you are still able to login at this point).
- Go to Preferences and select Network.
- Open the Test tab.
- Enter myakitio.com into the first field after “Ping” and click Check.
- Copy and paste the results into a text file.
- Enter myakitio.com into the second field after “Traceroute” and click Check.
- Copy and paste the results into a text file.
- Open the drop-down menu in the top left corner under the A logo and select Server Info.
- Copy and paste the whole text into a text file.
- Include these files in your report to our tech support.
Setup and Configuration
How to setup an external USB drive as system drive
In general, we recommend to install at least one internal (SATA) hard drive but the system can also run with just an external USB drive. The disadvantage is that you need two power supplies (one for the MyCloud and one of the USB drive) and the setup of the drive (creating a partition and formatting the drive) has to be done manually, using the “Expert” menu of the MyCloud disk utility.
The following instructions are for blank drives without any existing partition(s) or data on it. If your drive has an existing partition and some data on it already, backup your data to a different location first! Once the backup is completed, connect the drive to your NAS and in the disk manager, click Unmount Partition, followed by Delete Partition. This step erases all existing data on that drive. Your drive is now ready for setup as system drive.
Open the disk manager
- Open the web browser and login to your network drive.
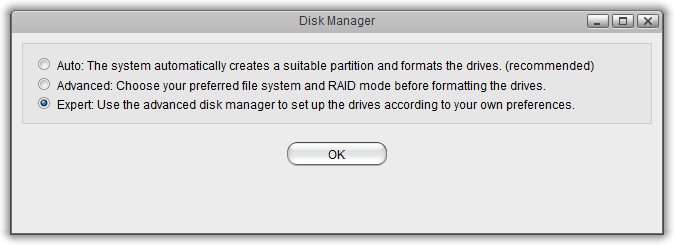
- A window opens automatically with a message saying that the system is running without a HOME partition. Select Management to open the disk manager.
- Select the Expert mode and click OK.
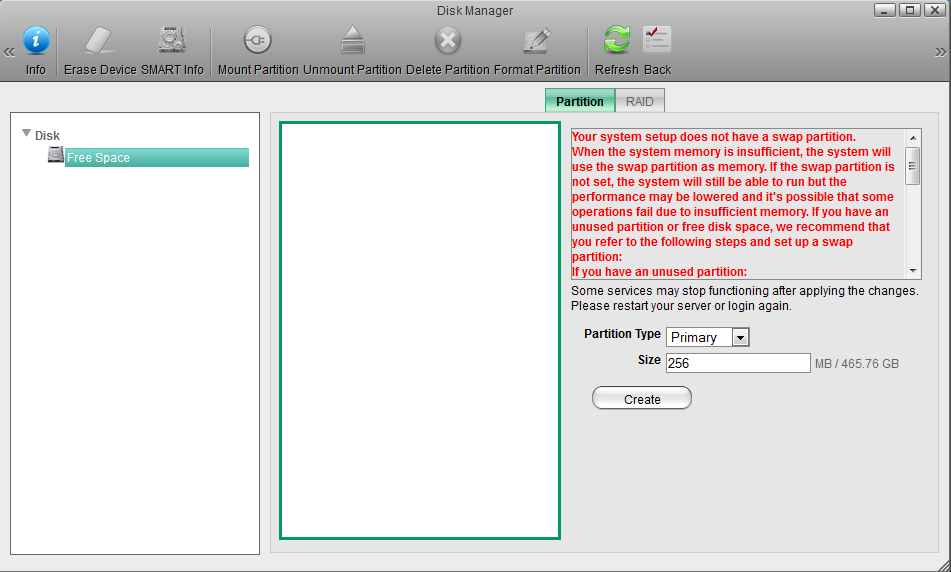
Create a Swap partition
- In the panel on the left, select Free Space.
- For the “Partition Type”, select Primary.
- For the “Size”, enter 256.
- Click Create.
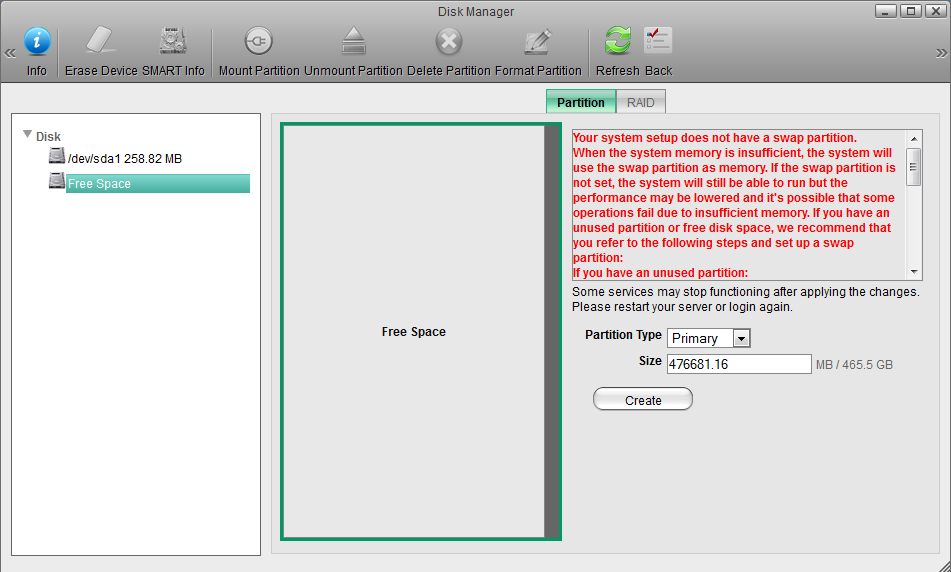
Create a HOME partition
- In the panel on the left, select Free Space.
- For the “Partition Type”, select Primary.
- For the size, use the default value (the remaining space).
- Click Create.
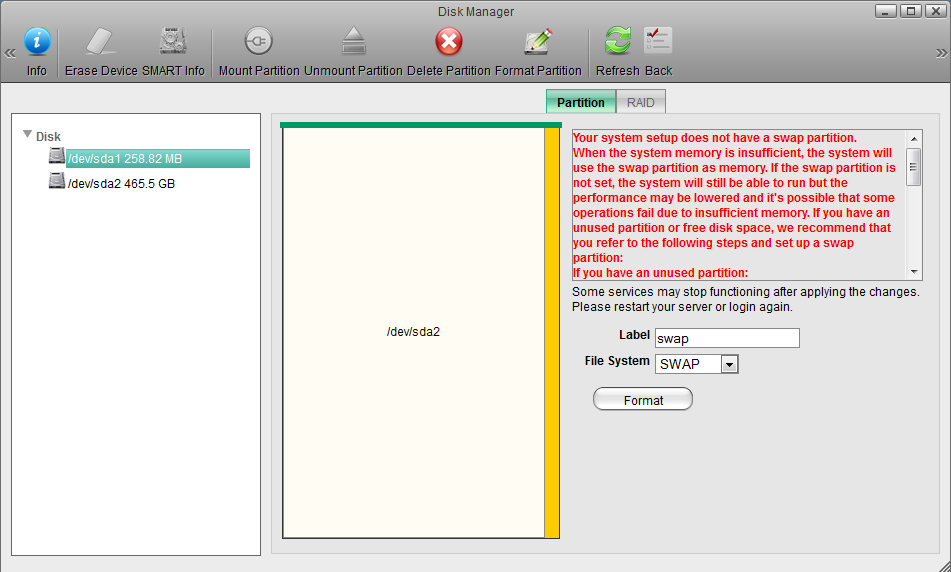
Format the Swap partition
- In the panel on the left, select the smaller partition /dev/sda1.
- For the “Label”, enter swap.
- For the “File System”, select SWAP.
- Click Format.
- Wait until the partition is completely formatted and then close the progress window and return to the disk manager.
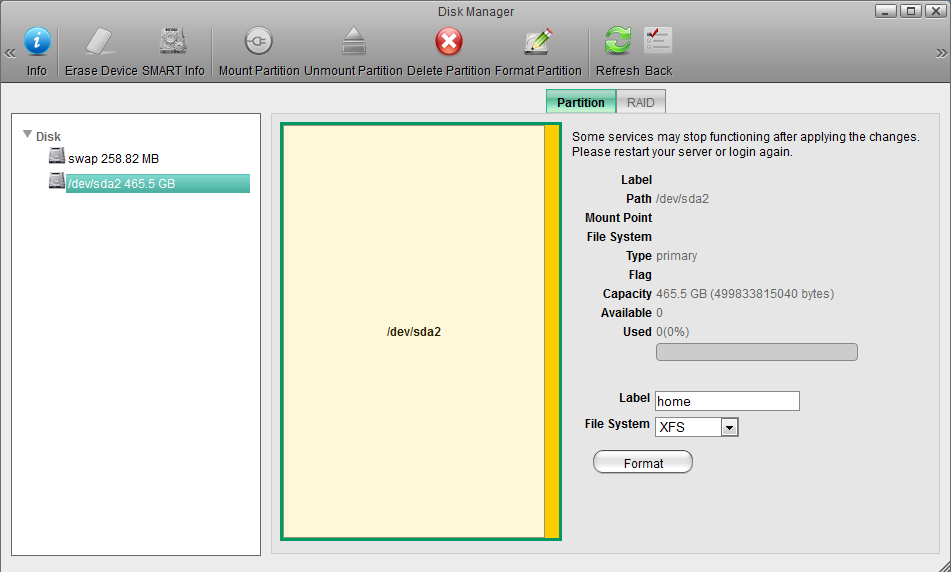
Format the HOME partition
- In the panel on the left, select the larger partition /dev/sda2.
- For the “Label”, enter home.
- For the “File System”, select XFS.
- Click Format.
- Wait until the partition is completely formatted and then close the progress window and return to the disk manager.
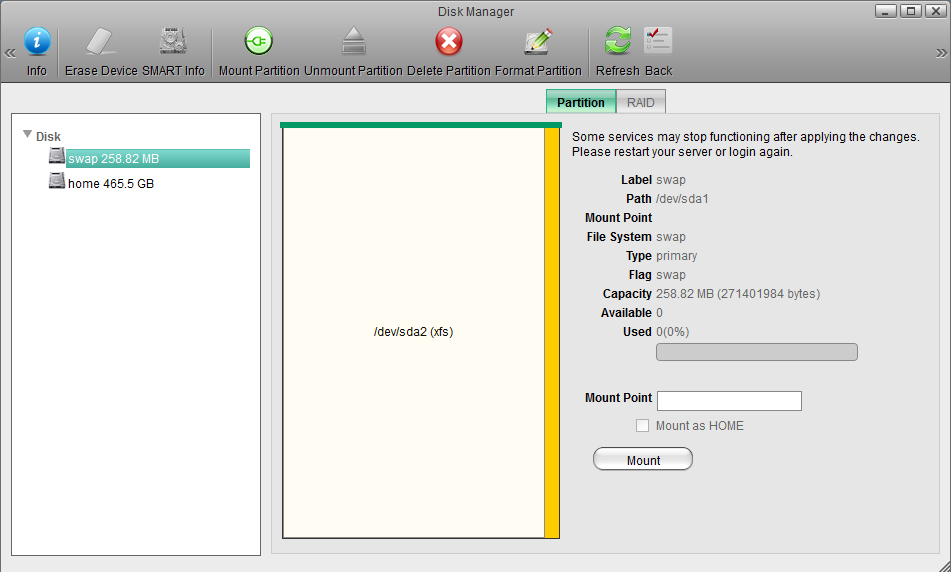
Mount the Swap partition
- In the panel on the left, select the swap partition.
- Click Mount.
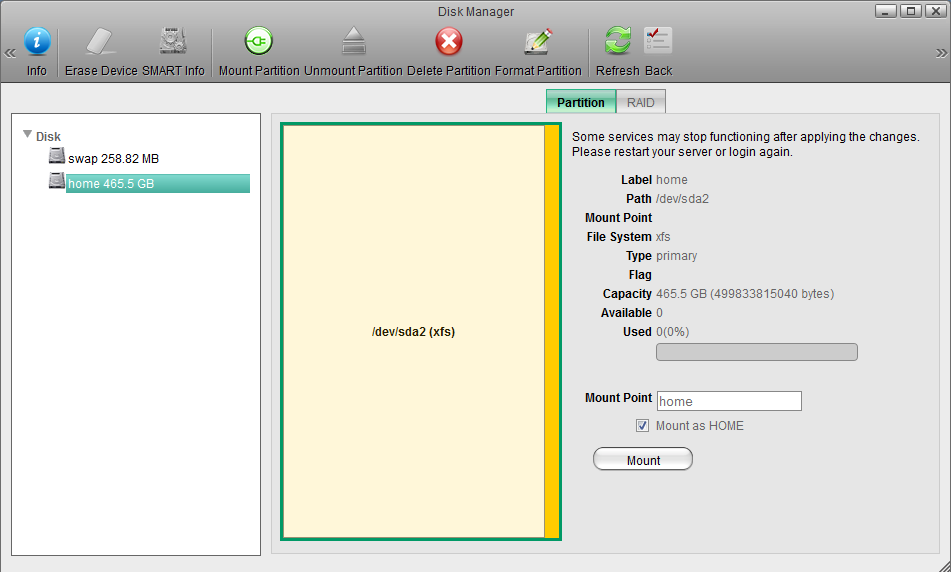
Mount the HOME partition
- In the panel on the left, select the home partition.
- Check the Mount as HOME option.
- Click Mount.
File Access and Playback
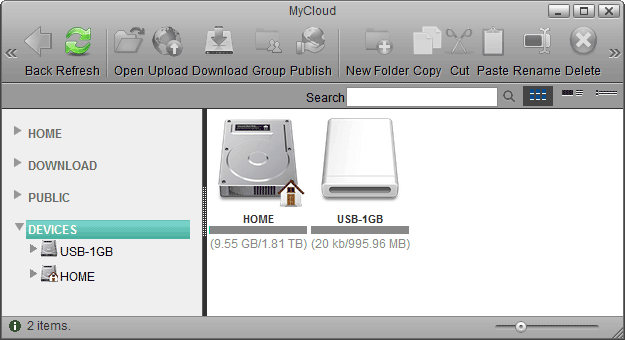
How to access files on a USB drive
- Connect the USB drive to the USB port on your network drive and turn on the power.
- Open the web browser and login as administrator (admin).
- You can now access the data on the USB drive under DEVICES.
If USB bus power is insufficient to power up the hard drive, please connect an external power adapter to your USB drive.
Instead of using the web browser to access your data, you can also mount the network drive via SMB (Samba) or AFP. On the PC, use SMB and on the Mac, use AFP. The data on the USB drive is inside the device folder.
Only the administrator (admin) can see and access the USB drive. If you want to share the data with other users, copy the files to the PUBLIC folder on your network drive or use the Share function. Select an existing folder or create a new folder on the USB drive, right-click on it, select Share, select Group and then set up your preferred user access.
USB drives with capacities over 2TB are not supported!
Supported file systems
Following file systems are supported by the network drive.
- FAT32
- NTFS (make sure to follow the safe removal procedure when ejecting the drive from the computer)
- HFS (read only)
- EXT2, EXT3, EXT4
- XFS
