Table of Contents
How To Articles and Tutorials
Local and Remote Login
How to remotely access the device without using the web portal at myakitio.com
Fixed IP: If you have a fixed external IP address (WAN), setup port forwarding on your network router and then use the external IP plus port number (e.g. 185.152.83.10:10080) to access your device remotely.
Dynamic IP: If you have a dynamic external IP address (WAN), you can use the Dynamic DNS service at noip.com (free) or DynDNS.com (requires monthly fee).
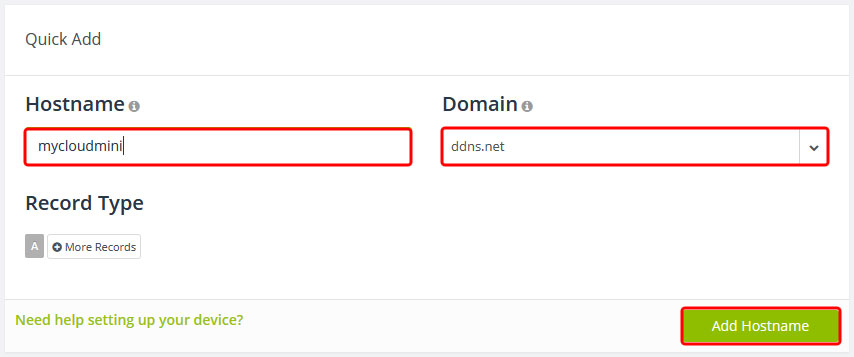
- Go to noip.com and sign up for a free Dynamic DNS account.
- Login to your new account and add a new hostname.
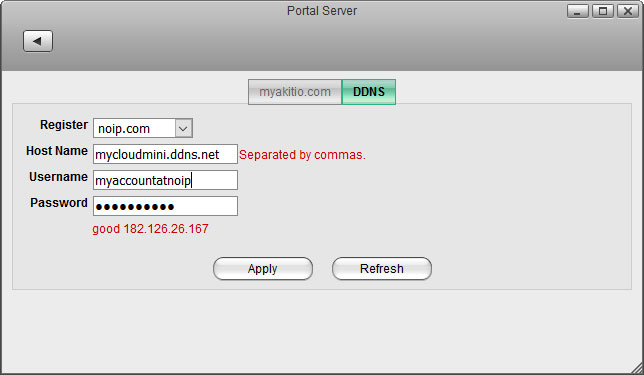
- On your local network (LAN), login as admin and go to Preferences > Portal Server.
- Open the DDNS tab and select noip.com from the drop-down menu. If you don't see noip.com as an option, your device needs a firmware update.

- Enter the hostname you have just registered at noip.com as well as the username and password of your account at noip.com, then click Apply to save the settings. If the information is valid, you will see a message displaying good along with your current external IP address.
- Login to your network router and navigate to your routers port forwarding section, sometimes also known as virtual server.
- Create a new port forwarding entry, redirecting incoming TCP/UDP traffic from a custom port like 10080 for example to port 80 on your network drive. For more details about port forwarding, please refer to the free guidelines at portforward.com. To check if it's working as expected, you can use the Port Check Tool at portchecktool.com.
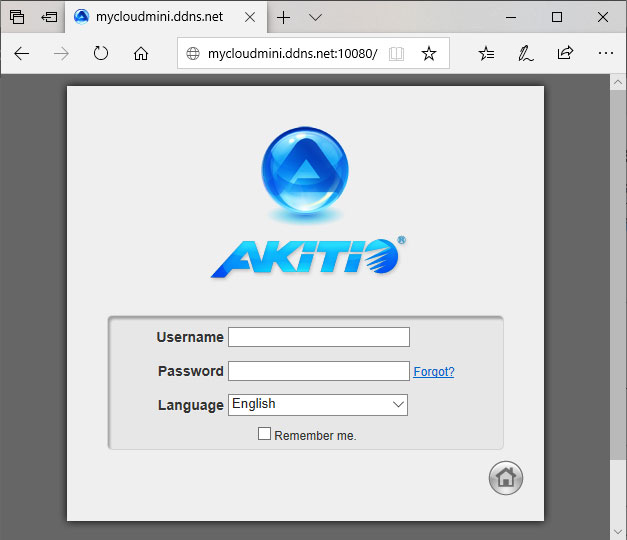
- To access your device remotely, you can now use the hostname you registered plus the custom port number to login. In this example here, you would enter mycloudmini.ddns.net:10080 into the URL field of your web browser. This address is then redirected to port 80 on your network drive and you should see the login page of your device.
How to troubleshoot the error "Connect to device timeout"
- The reason for this error is usually temporary. At first, we recommend to wait for a minute and then try again.
- If the above tip does not solve the problem, please reboot the network drive.
- If none of the above helps or the reboot solves the problem only for a short while and it happens again very often, please contact tech support.
Setup and Configuration
How to setup an external USB drive as system drive
In general, we recommend to install at least one internal (SATA) hard drive but the system can also run with just an external USB drive. The disadvantage is that you need two power supplies (one for the MyCloud and one of the USB drive) and the setup of the drive (creating a partition and formatting the drive) has to be done manually, using the “Expert” menu of the MyCloud disk utility.
Open the disk manager
- Open the web browser and login to your network drive.
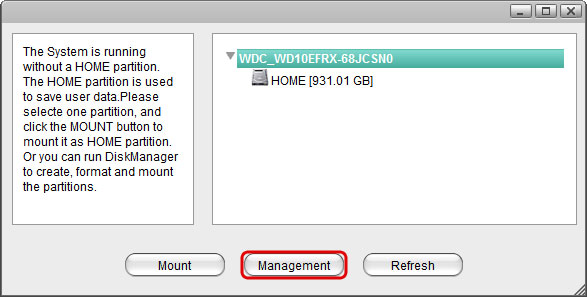
- A window opens automatically with a message saying that the system is running without a HOME partition. Select Management to open the disk manager.
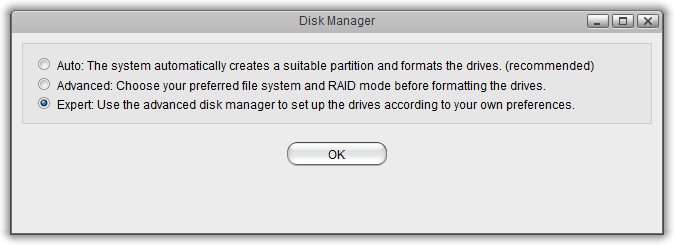
- Select the Expert mode and click OK.
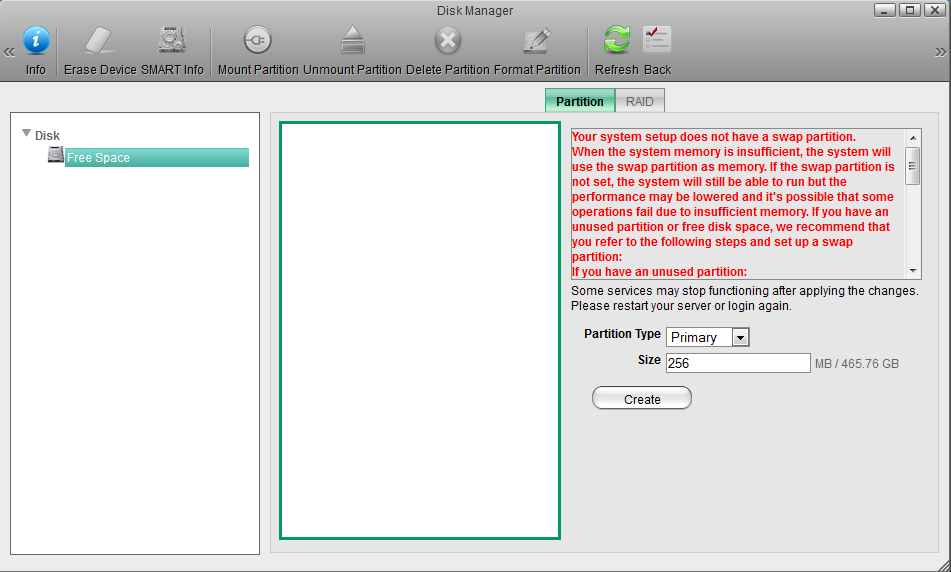
Create a Swap partition
- In the panel on the left, select Free Space.
- For the “Partition Type”, select Primary.
- For the “Size”, enter 256.
- Click Create.
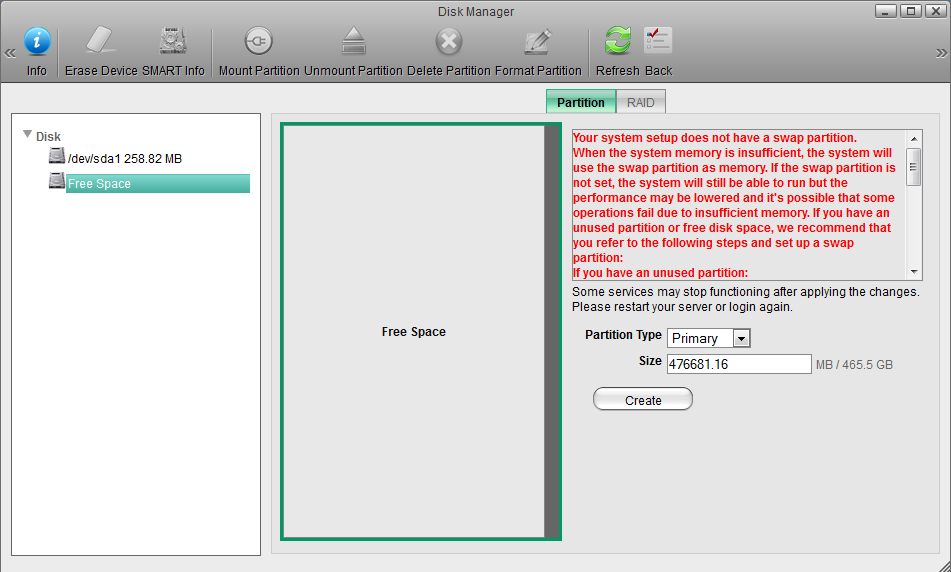
Create a HOME partition
- In the panel on the left, select Free Space.
- For the “Partition Type”, select Primary.
- For the size, use the default value (the remaining space).
- Click Create.
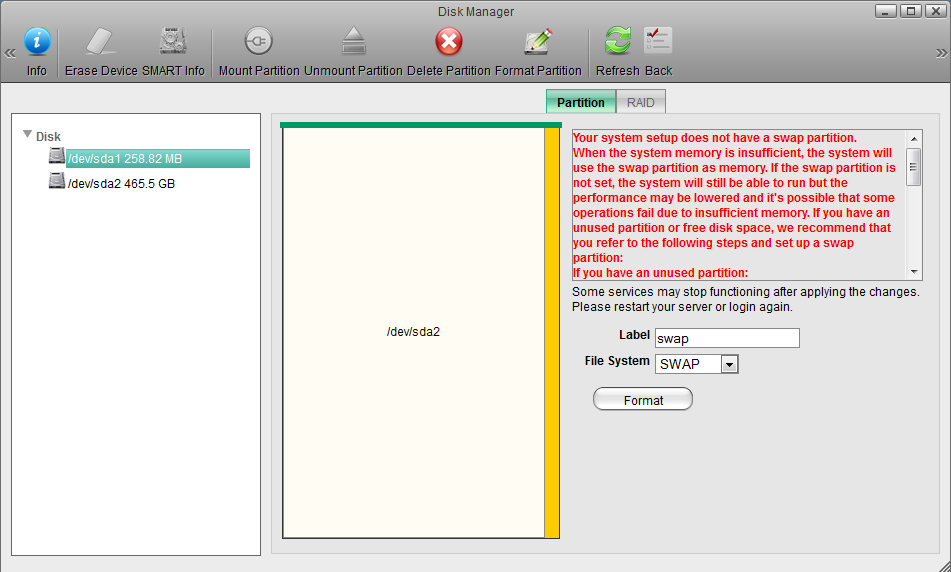
Format the Swap partition
- In the panel on the left, select the smaller partition /dev/sda1.
- For the “Label”, enter swap.
- For the “File System”, select SWAP.
- Click Format.
- Wait until the partition is completely formatted and then close the progress window and return to the disk manager.
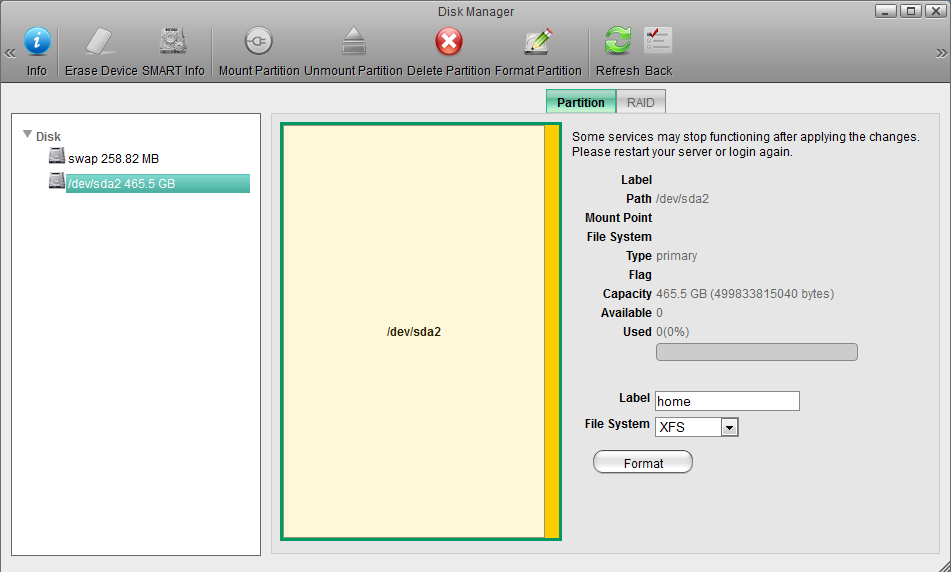
Format the HOME partition
- In the panel on the left, select the larger partition /dev/sda2.
- For the “Label”, enter home.
- For the “File System”, select XFS.
- Click Format.
- Wait until the partition is completely formatted and then close the progress window and return to the disk manager.
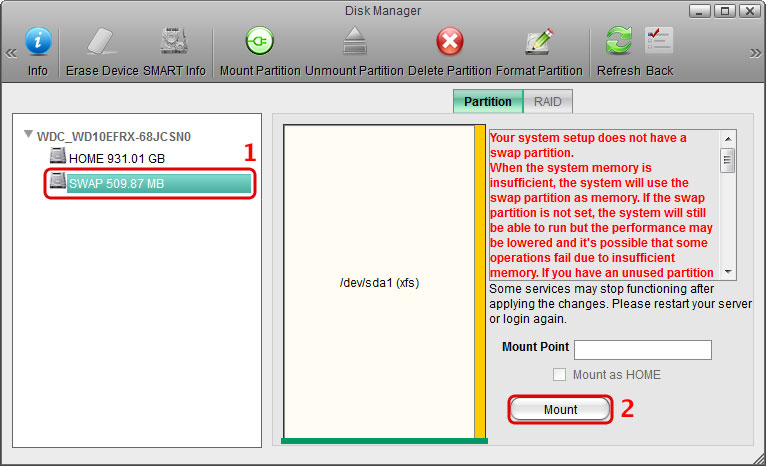
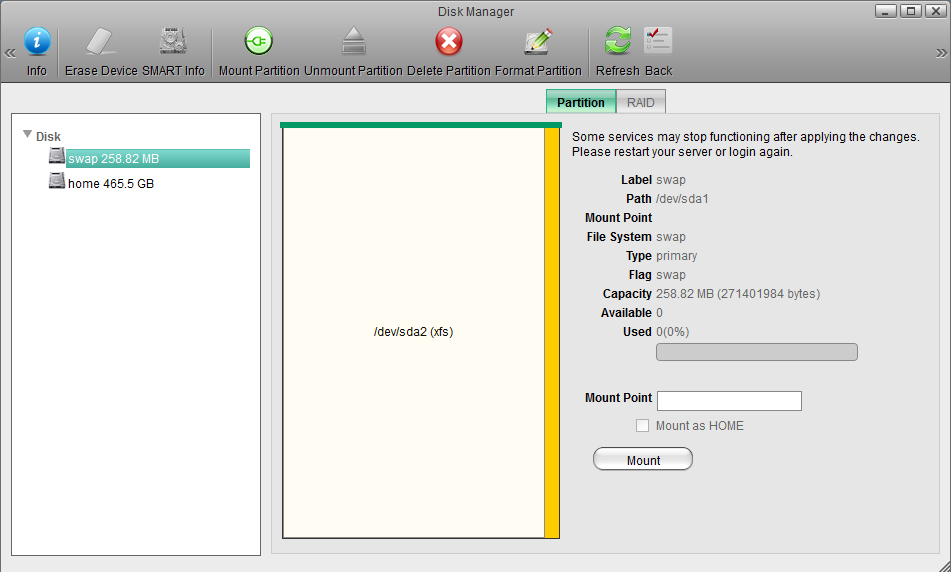
Mount the Swap partition
- In the panel on the left, select the swap partition.
- Click Mount.
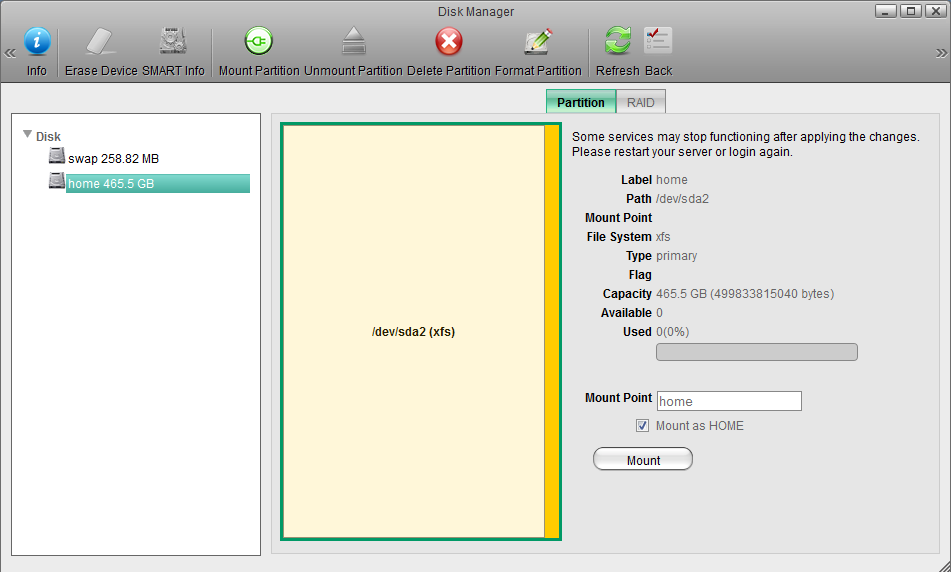
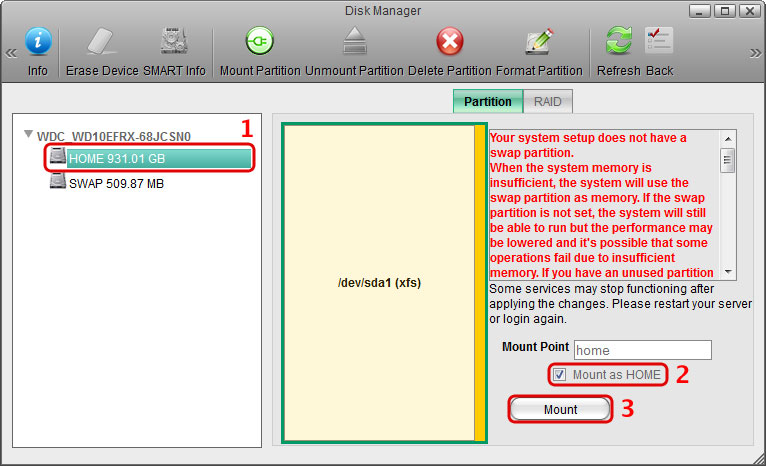
Mount the HOME partition
- In the panel on the left, select the home partition.
- Check the Mount as HOME option.
- Click Mount.
File Access and Playback
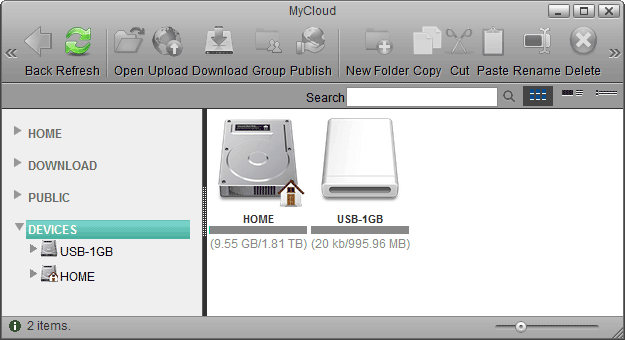
How to access files on a USB drive
- Connect the USB drive to the USB port on your network drive and turn on the power.
- Open the web browser and login as administrator (admin).
- You can now access the data on the USB drive under DEVICES.
Supported file systems
Following file systems are supported by the network drive.
- FAT32
- NTFS (make sure to follow the safe removal procedure when ejecting the drive from the computer)
- HFS (read only)
- EXT2, EXT3, EXT4
- XFS
How to mount existing partitions
Under some circumstances (e.g. after a reset, after receiving a replacement product), you might have an existing HOME and SWAP partition that contains all your data but you are not able to access it, because the partitions are no longer mounted. If that happens, a pop-up window will appear upon login and inform you that the system is currently running without a HOME partition. All you need to do is simply mount the existing partitions again.
- Click Management to open the disk manager. Alternatively, go to Applications > Disk Manager > Expert.
- Select the existing HOME partition, enable the Mount as HOME option and click Mount.
- Select the existing SWAP partition and click Mount.