This is an old revision of the document!
Table of Contents
MyCloud Pro
The MyCloud Pro is designed for two desktop 3.5“ SATA hard drives. It provides safe and secure network storage plus the ability to easily share your digital content with family and friends. Stream content within your local network to any available UPnP-AV and DLNA device (e.g. PS3, iTunes, Windows 7, etc.). Remotely access your files through any internet connected computer or through our free iPhone, iPad and Android apps.
| CPU |
|
| Memory |
|
| Internal hard drive(s) |
|
| Front I/O |
|
| Rear I/O |
|
Front View

| HDD LED | |
|---|---|
| Blue | Power ON |
| Flashing orange | Data access |
| Front Panel | |
| | Power switch (blue when turned on) |
| OS |
|
| | Flashing orange = Data access |
| |
|
| | USB 2.0 host port |
| | USB copy button |
Rear View

| DC 12V | Power receptacle (DC +12V/5A) |
| | USB 3.0 host port |
| | Gigabit Ethernet port |
| Reset | System reset button |
To reset the device back to factory default, press and hold the reset button for 12 seconds and then release it. After the reset, it will be necessary to manually mount the HOME and SWAP partition. Also, even though the private files of the other users can still be accessed by the admin, it will be necessary to recreate the previous user accounts before the users can login again and access their existing data.
Power ON/OFF Procedure
Connect the power supply to your device first and only then plug it into the wall socket. To turn on the device, press the power switch to start up the system. It takes about 1-2 minutes for the device to go online. The green system LED (OS) indicates when the system is ready.
To safely turn off the device, press the power switch for about 1 second until the system LED (OS) starts flashing. The system then shuts down all services and about 20 seconds later, it will power down.
If for some reason the system is unresponsive, press and hold the power switch for 6 seconds to forcefully shut down the system and cut off the power.
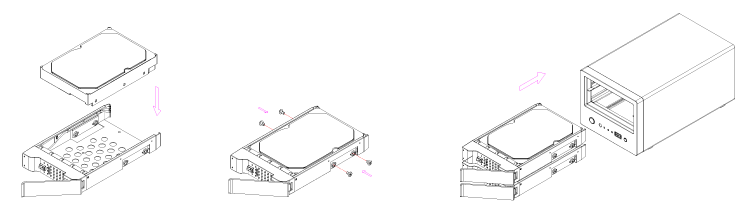
HDD Installation
Push the protruding left edge of the tray handle in to release the tray and use the handle to pull out the tray.
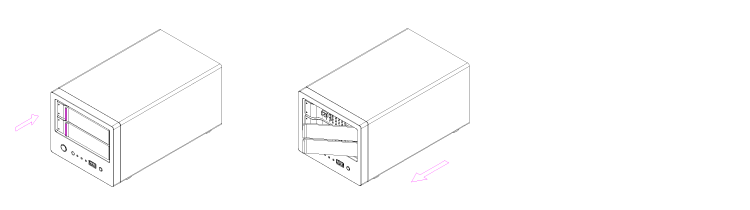
Install the hard drive, making sure the connector is facing the open side of the bracket. Slide the tray back into the enclosure and push the handle lightly into place.