This is an old revision of the document!
Table of Contents
安裝指南
開始使用「私有雲」網路儲存裝置時,首先先確認裝置是否有可以存方的硬碟。安裝硬碟首先需要初始化硬碟,這個過程會格式化您的硬碟,如果您需要備份硬碟內容,請在格式化前進行,否則資料將被刪除。
步驟 1~3 是第一次使用時,需要進行的動作。
步驟 4~5 是使用時,會進行到的動作。

步驟 1 - 安裝硬碟
系統所使用的儲存空間,我們建議您使用內建的硬碟,或是透過 eSATA 所連接外接硬碟,並且建議您使用私有雲內建的格式化工具來掛載您的儲存空間,依據您購買的私有雲產品,決定您所安裝的硬碟尺寸,是安裝 2.5“ 硬碟還是安裝 3.5” 硬碟。
詳細的私有雲系列硬碟安裝說明如下:
步驟 1 - 登入
通過 http://www.myakitio.com 入口網站連線登入,是最方便的方式。步驟如下:
- 打開您的瀏覽器。 (如:IE, Firefox, Safari, Chrome)
- 輸入 http://www.myakitio.com 網址,進入 AKiTiO 的 NAS 入口網站。
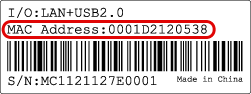
- 確認裝置的 MAC address ,您可以在產品的包裝盒上,或是產品本體的底部上查看到。
- 在 (1) 中輸入 MAC address 或是您已註冊的名稱,按下放大鏡 (2) 找尋您的私有雲裝置。
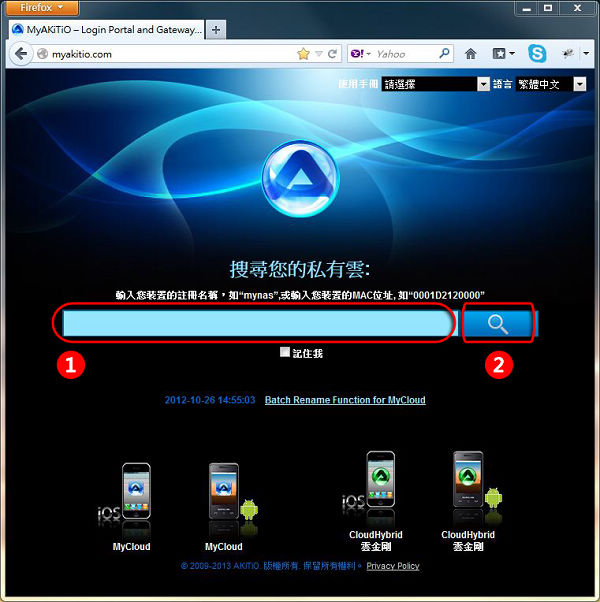
- 進入登入畫面後,請輸入您的帳號與密碼,按下「Enter」鍵,或是右下方的房子小圖示。
步驟 3 - 設定硬碟
在您使用「私有雲」設備前,您必須先安裝硬碟,並將硬碟掛載到系統中。
- 首先請使用管理員(admin)登入。
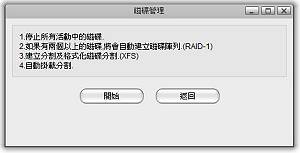
- 在工具欄上,點擊「磁盤管理」。
- 選擇「自動」,然後點擊「確定」。
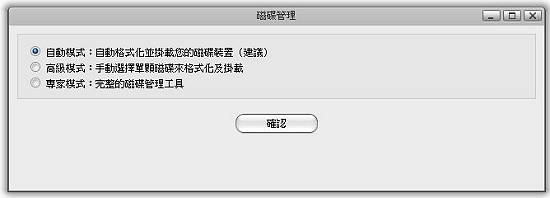
- 點擊「開始」進行硬碟安裝動作。
步驟 4 - 上傳檔案
Once the system drive has been setup, you can start uploading your digital media files to the network drive. The HOME directory with its predefined folders for documents, music, photos and videos is for your private files. The PUBLIC directory is for files that are shared among the users that have access to this device (by default, this is only the administrator).
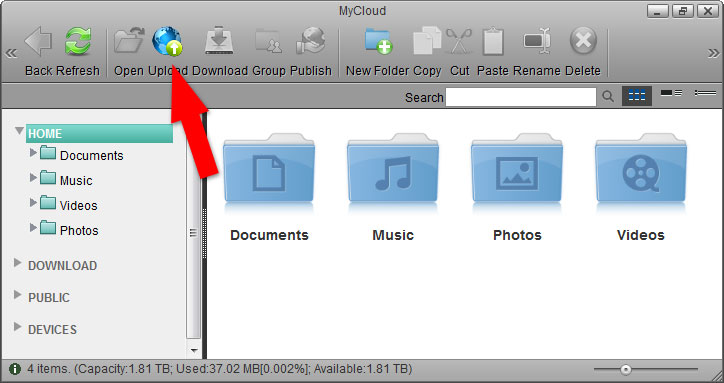
- On the desktop, click on MyCloud to open the file explorer window.
- Depending on the files types you want to upload, select one of the predefined folders (e.g. Documents, Music, Photos, Videos).
- In the menu bar, click Upload.
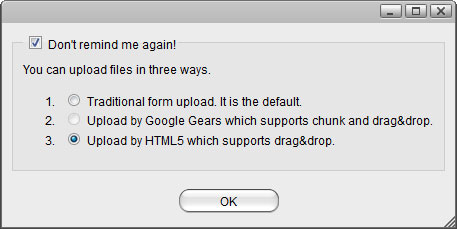
- Select one of the available upload methods. If in doubt, select the traditional form upload. This will work on most browsers but you will have to upload the files one at the time. Instead, if you are running one of the more recent browsers, select Upload by HTML5, which allows you to drag and drop multiple files directly into the upload window.
- Upload your media files.
步驟 5 - 瀏覽檔案
Once you have uploaded your digital media files, you can setup the media server and the music server to stream your music and videos on the home network.
UPnP-AV Media Server
The media server streams your files to other UPnP-AV and DLNA compliant clients (e.g. PS3, Xbox360, Windows Media Player, etc.). To find DLNA compliant media devices that can play your media files on the network drive, look for the “DLNA Certified” logo or use the Product Search on the official DLNA website.
- In the toolbar, click on Preferences.
- Select Media Server.
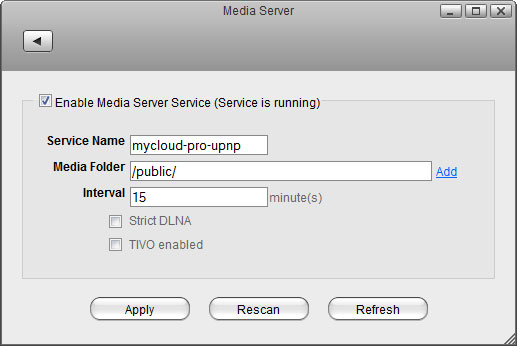
- Make sure the service is enabled and running.
- Click Add to select the folder(s) where your media files are stored. If needed, you can add multiple folders. The media server will scan for all the compatible media files in those directories and then stream them to the other UPnP-AV compliant devices on your home network.
- Click Apply to save the settings.
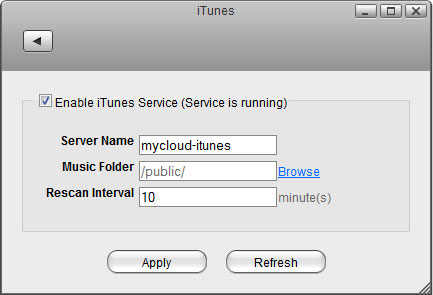
iTunes 音樂服務
The iTunes music server streams music files that are located on the network drive to iTunes users on the home network. Simply install iTunes on your PC or Mac and use it to playback the music files on your network drive.
- In the toolbar, click on Preferences.
- Select iTunes.
- Make sure the service is enabled and running.
- Click Browse to select the folder where your music files are stored.
- Click Apply to save the settings.
步驟 6 - 分享檔案
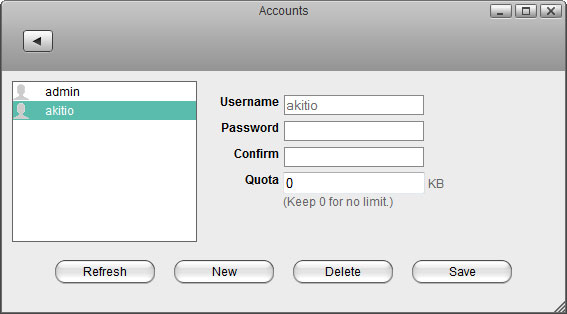
There are several ways you can share files with your family and friends but before you start, it's easiest to give them a user account on the network drive.
- In the toolbar, click on Preferences.
- Select Accounts.
- Click New.
- Enter a username.
- Enter a password and confirm it.
- Click Save to create the new account.
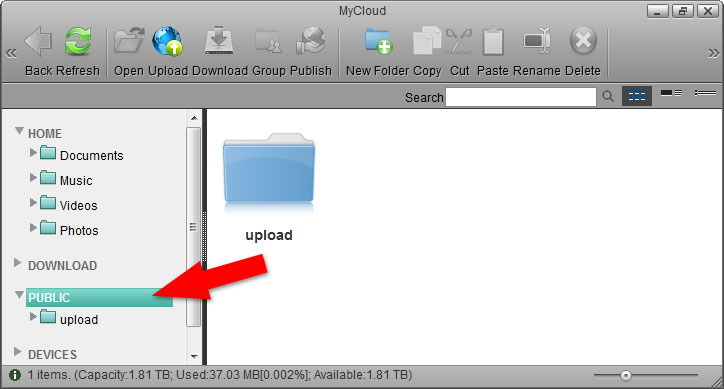
Public Directory
Files that are stored in the PUBLIC directory are accessible to all users (read & write). Simply copy a file to the PUBLIC folder and the next time another user logs in, they can view it. It doesn't matter if the user logs in via web interface or mounts the network drive on the home network.
Sharing a Folder
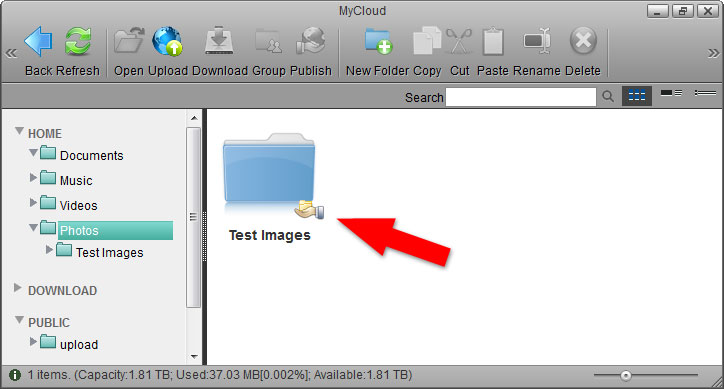
If you want to share files with other users but restrict access, as an example only to certain users or give them only read access, you can use the context menu in the web interface.
- On the desktop, click on MyCloud to open the file explorer window.
- Right-click on the folder you want to share to open the context menu.
- Select Share and click Group.
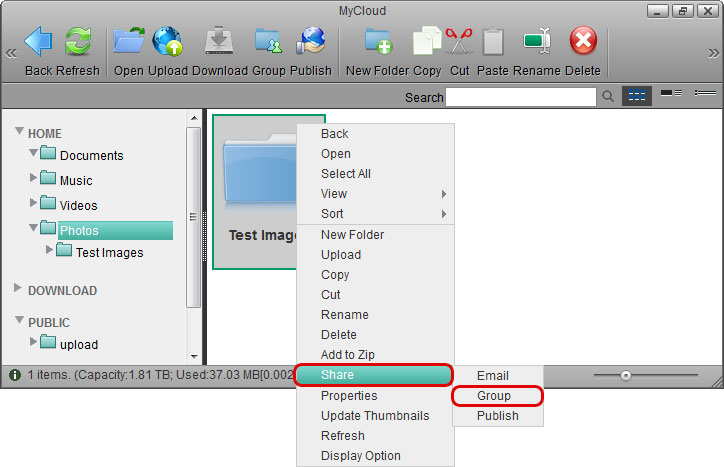
- Enable the option Share this folder and select the users you want to share the folder with.
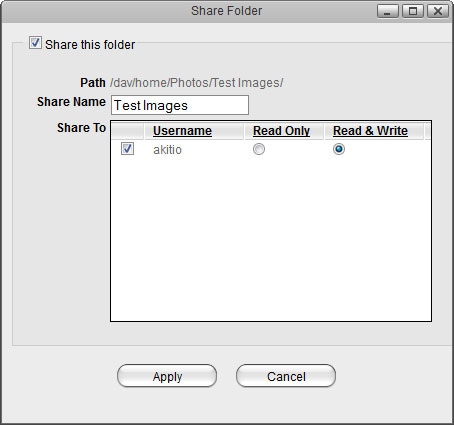
- Click Apply to save the settings.
- Click Refresh and the folder icon shows a hand to indicate that this folder is currently shared.