Table of Contents
FTP on a Mac
FTP has fast transfer rates and can be used both on the home network (LAN) and remotely (WAN). However, the files have to be transferred to the computer first, before you can open and view them. Also, you will have to know the IP address of your network drive and for remote access, port forwarding on the network router is required.
Setup FTP Service
- Login to your network drive as administrator.
- Go to Preferences > FTP.
- Make sure the FTP service is up and running.
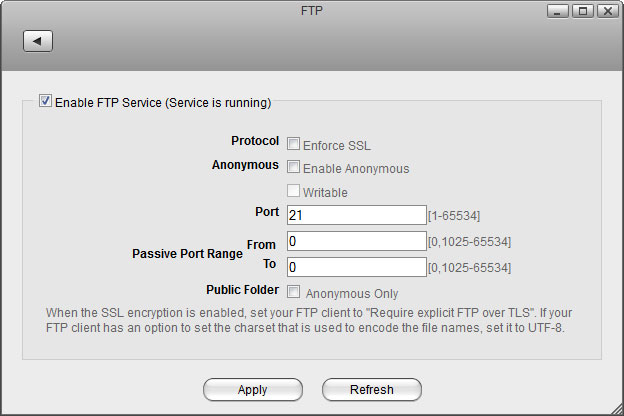
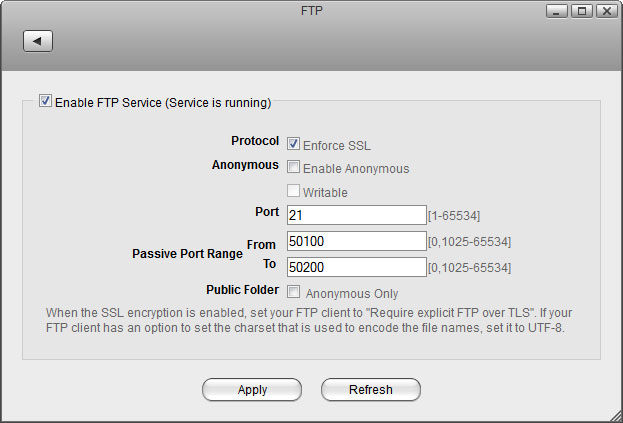
- If you plan on connecting remotely from outside your home network, it's best to enable the option Enforce SSL and to assist port forwarding, it's necessary to set a passive port range of about 50-100 ports.
Connect to Server
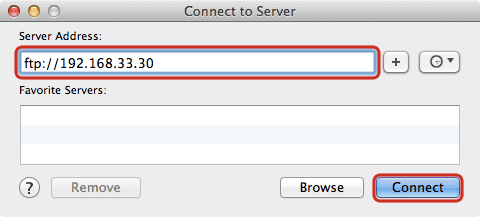
- From the Go menu in the menu bar choose Connect to Server or use the keyboard shortcut Command+K.
- Type ftp:// followed by the local IP address (e.g. 192.168.1.10) of your network drive and click Connect.
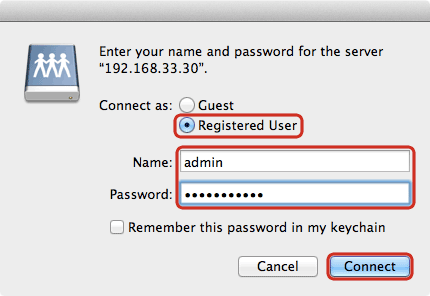
- Select Registered User, enter the login credentials of your user account on the network drive (e.g. admin/admin) and click Connect.
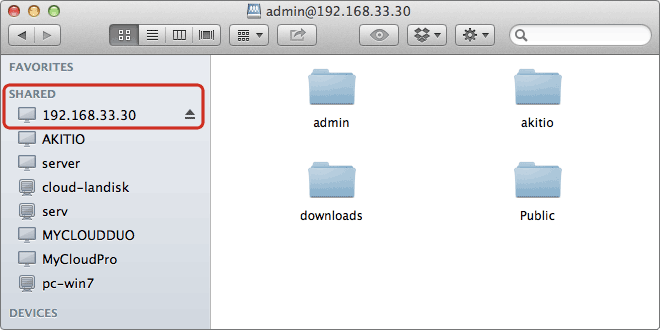
- The network drive is now listed in your finder under Shared devices. When no longer needed, click on the eject button to disconnect the drive.
FTP Client
A FTP client makes it easier to manage multiple accounts and it is also more convenient to transfer the files. In addition, the FTP client provides functions like pause, resume, error logs, backup and more. If you already have a FTP client, simply use your preferred program. If you are still looking for a client, you could try FileZilla or Cyberduck just to name two.
Home Network (LAN)
In this environment, both the network drive and the computer where the FTP client is installed are connected to the same local network.
- Start up your FTP client. In this example, we are using FileZilla.
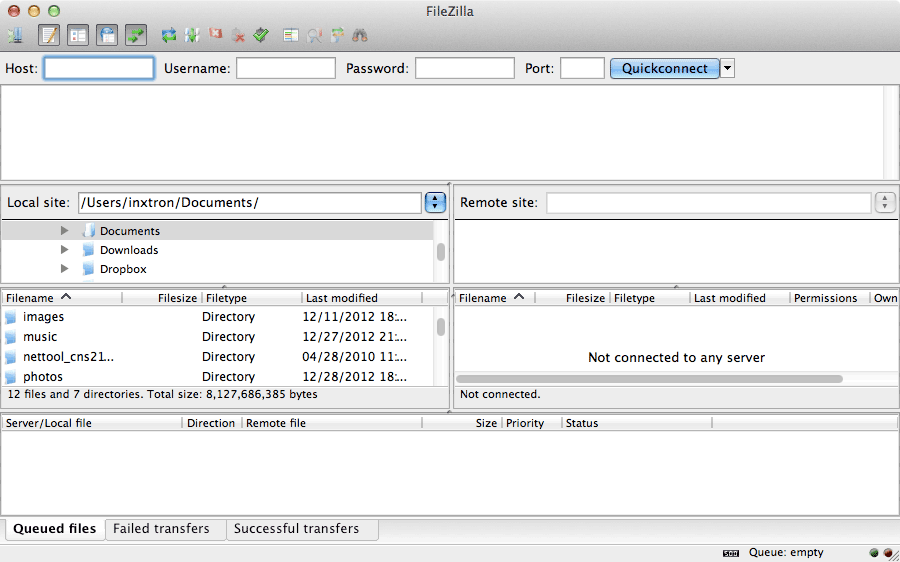
- Open the Site Manager.
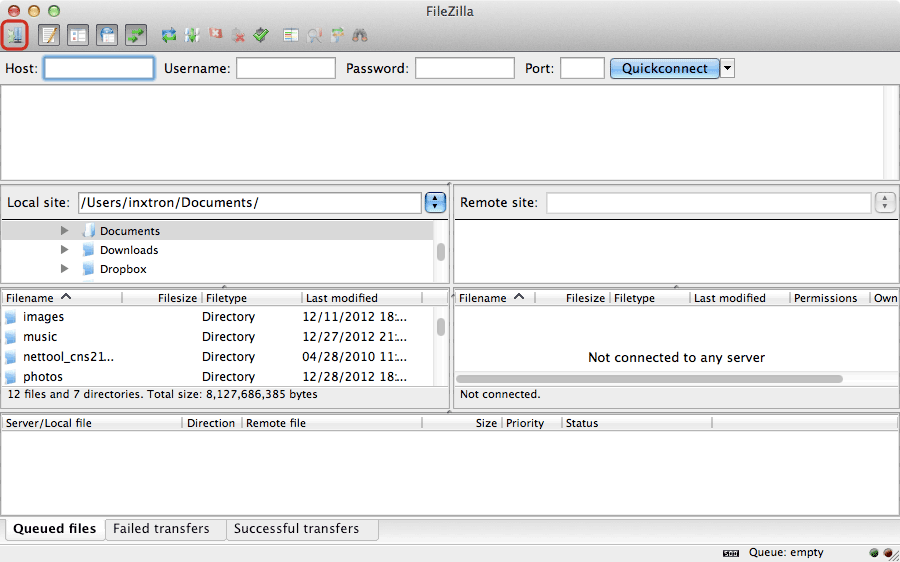
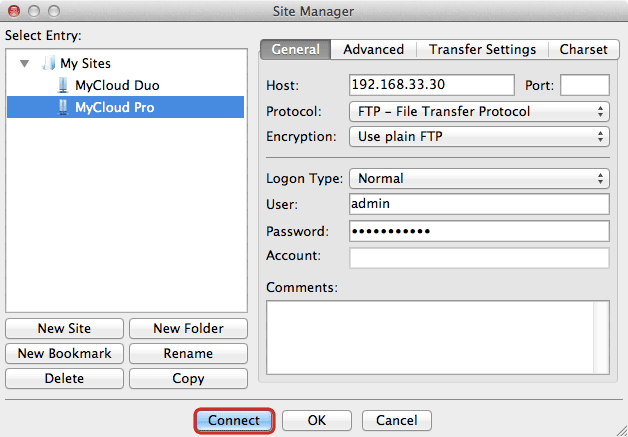
- Click New Site and create a new account for your network drive.
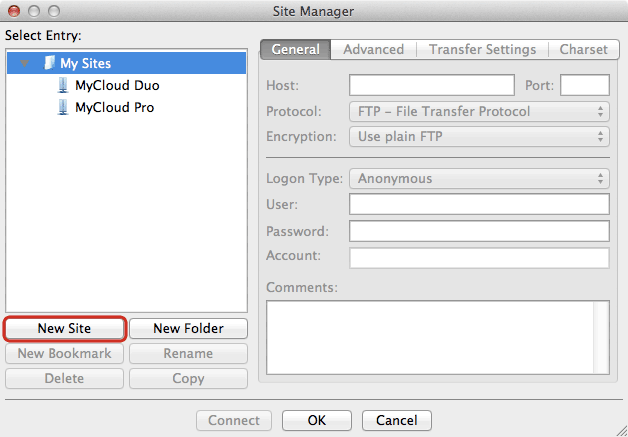
- For the host, enter the IP address of your network drive (e.g. 192.168.33.30). Use the local IP address as seen under Preferences > Server Info but without the port number.
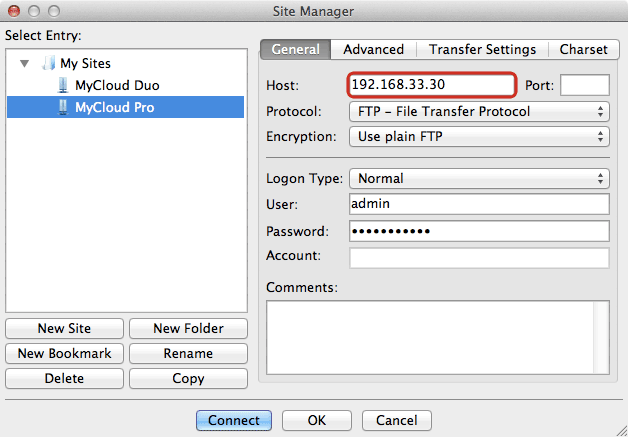
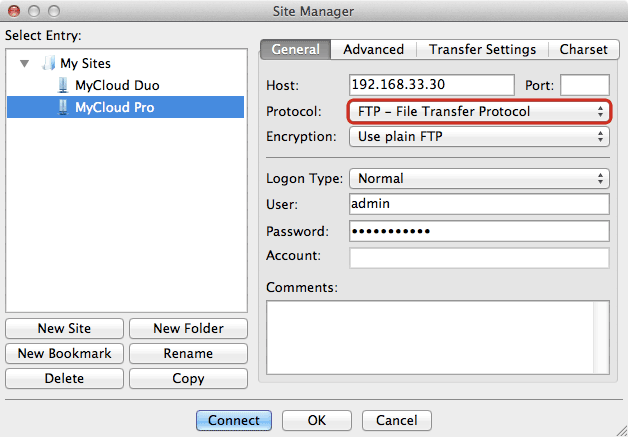
- For the protocol, select FTP - File Transfer Protocol.
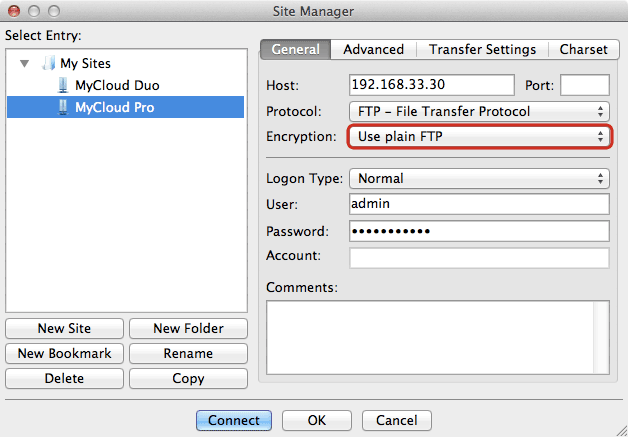
- For the encryption, select Use plain FTP. If the FTP server is set to use SSL encryption, select Require explicit FTP over TLS instead.
- For the logon type, select Normal and then enter the username and password of your user account on the network drive. As an example, the administrator would enter admin for both username and password.
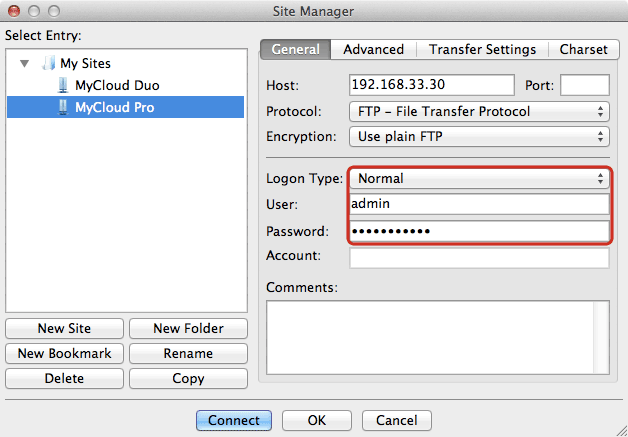
- Under normal circumstances, these are all the settings you have to configure and the rest can be left at default. However, if you have changed the port number for the FTP server and it's not using the default port 21, remember to enter the correct port number in the FTP client at this point.
- Double check all your settings and then click Connect. If you are using SSL encryption, you will be prompted to accept the certificate at this point.
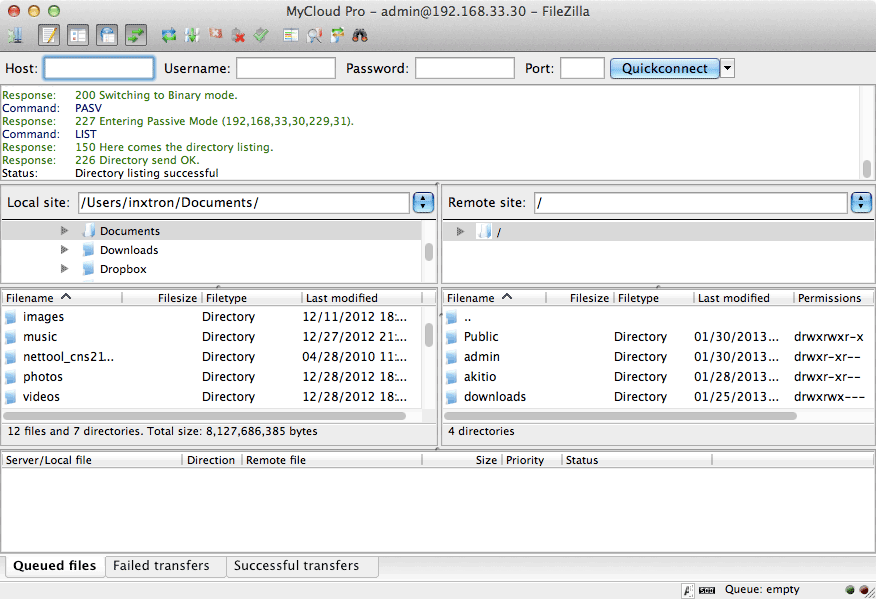
- You can now manage your files on the network drive.
Remote Connection (WAN)
In this environment, the computer where the FTP client is installed is not on the same network as the network drive. The connection is established over the internet from outside your home.
Network Router
- Write down the port number and the passive port range from your network drive.

- Login to your network router. This is the device that connects your home network to the internet. In some cases, this device has been provided by your ISP and in some cases it will be your own device, most likely a wireless access point that provides both the wired and the wireless network connection at your home.
- Find a setting called Port Forwarding. This function might be named differently on your particular router (e.g. Virtual Server), so it's best to first consult the user manual. You can also find some guides at http://portforward.com if the documentation doesn't include any samples.
- Setup port forwarding for TCP port 21 or whatever number you have set for the FTP port and redirect it to the IP address of your network drive. In most cases, the router will have a pre-set value for FTP traffic, so you can simply select FTP from a drop-down list.
- Setup port forwarding for the passive port range. In this example, you would redirect the traffic from TCP ports 50100-50200 to the local IP of your network drive at the same range 50100-50200.
FTP Client
- Start up your FTP client. In this example, we are using FileZilla.

- Open the Site Manager.

- Click New Site and create a new account for your network drive.

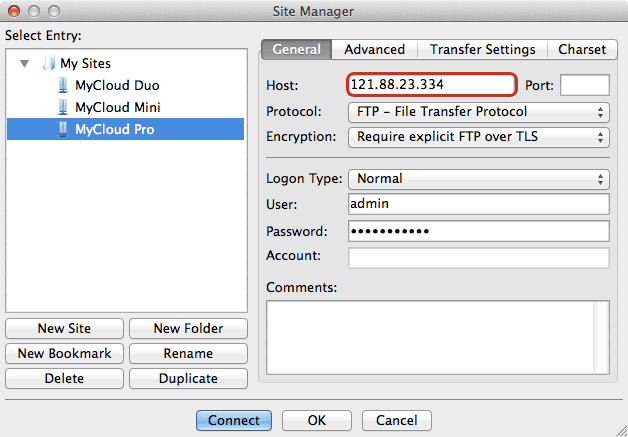
- For the host, enter the external IP address of your home network (e.g. 121.88.23.334). Go to Preferences > Server Info and copy the IP address seen under UPnP Port Forwarding but without the port number.
- For the protocol, select FTP - File Transfer Protocol.
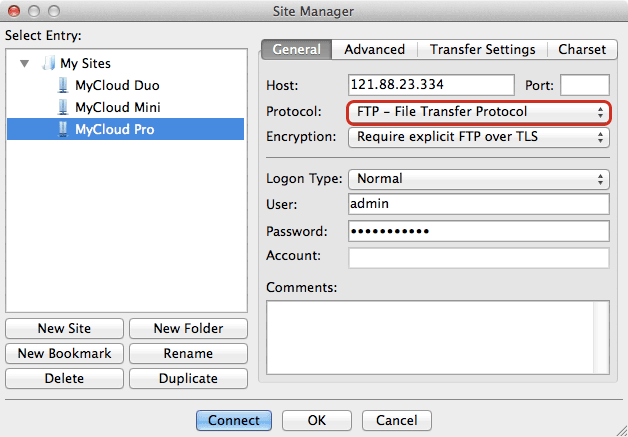
- For the encryption, select Use plain FTP. If the FTP server is set to use SSL encryption, select Require explicit FTP over TLS instead.
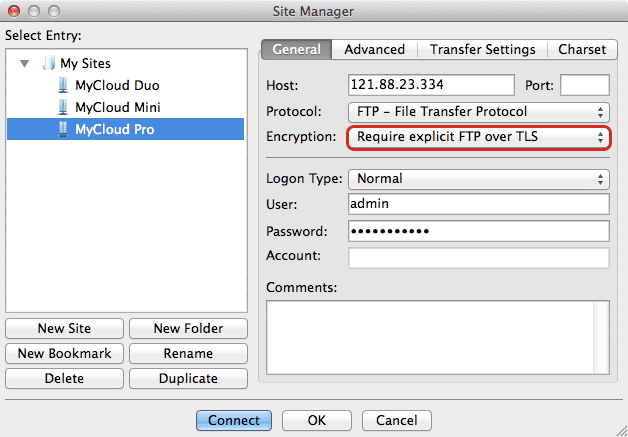
- For the logon type, select Normal and then enter the username and password of your user account on the network drive. As an example, the administrator would enter admin for both username and password.
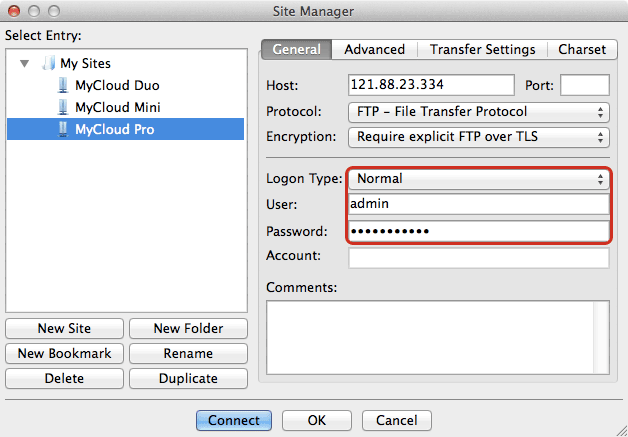
- Under normal circumstances, these are all the settings you have to configure and the rest can be left at default. However, if you have changed the port number for the FTP server and it's not using the default port 21, remember to enter the correct port number in the FTP client at this point.
- Double check all your settings and then click Connect. If you are using SSL encryption, you will be prompted to accept the certificate at this point.
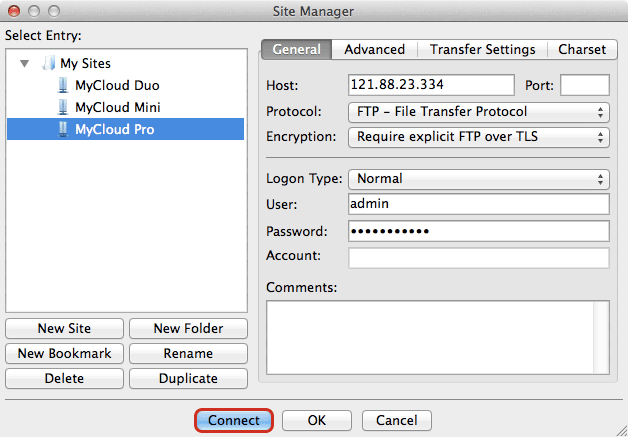
- You can now manage your files on the network drive.
Troubleshooting
- Some internet service providers block traffic on port 21. If that's the case, please change the port number to something above port 1024.
- If you already have a FTP server on the home network, make sure to use a different port for the FTP server on the network drive.
- When testing the remote FTP connection, your computer cannot be connected to the home network.
- To troubleshoot port forwarding, you can use the command console with a telnet command like “telnet 121.22.23.334 21”. If the connection can be established successfully, you should get a greeting from the FTP server (e.g. 220 <vsFTP 2.2.0>).
- To check if the problem is related to the settings on the network router, you can temporarily add the IP address of your network drive to the DMZ zone. This should theoretically forward all traffic to your network drive and skip the firewall.
- Most homes have a dynamic external IP address. This means that when you reboot the network router, it's likely that you will be assigned a new IP address. Make sure that you are using the correct IP in your FTP client.
